Free Shipping + New Deals On Snow Gear Shop Now
Backcountry: Snow

Backcountry: Snow

HOW TO
PREPARE FOR
BACKCOUNTRY SKIING &
SNOWBOARDING

Warning: There are myriad of inherent risks in backcountry snow sports. Reading this article is a good start, but it’s no substitute for formal education or practice using your own equipment.


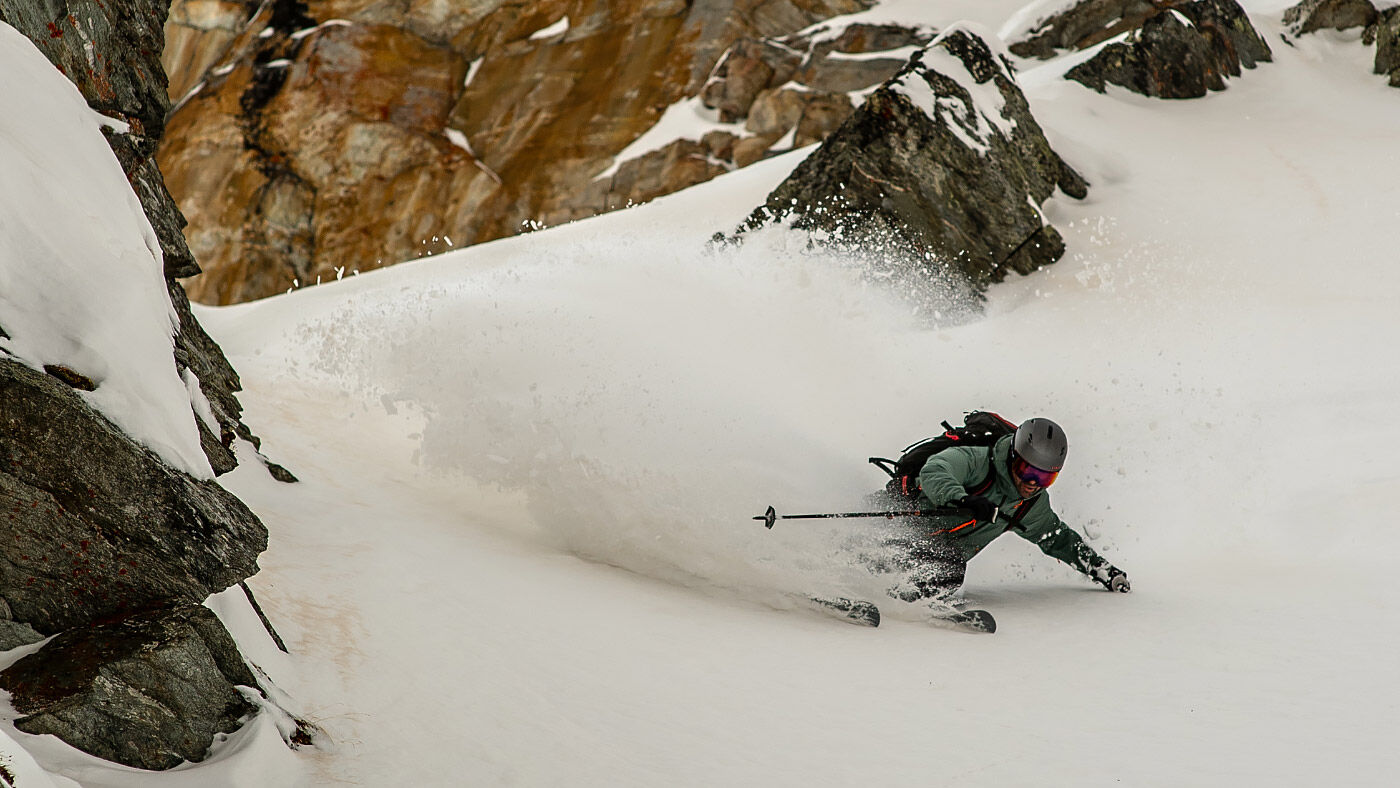
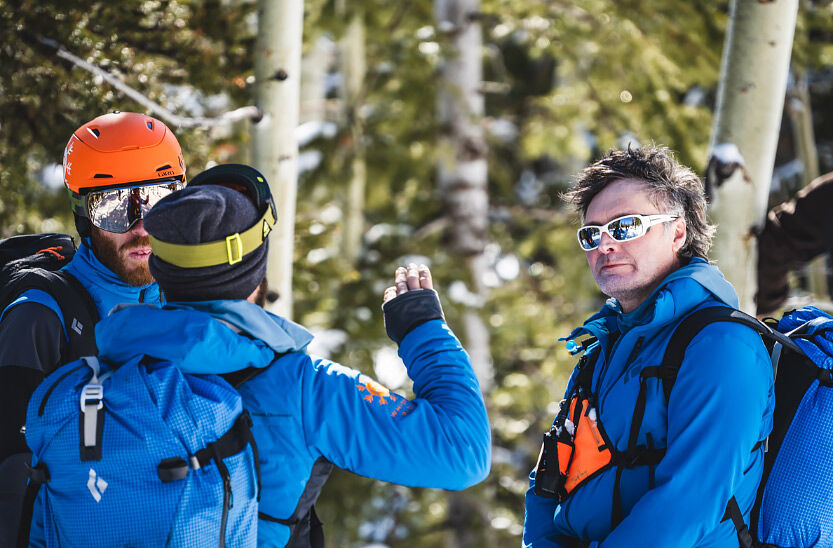
More and more riders are heading into the backcountry to enjoy the benefits—untracked powder, crowd-free runs, and pristine adventure. However, to say that you should “be prepared” before heading into the backcountry would be an understatement. Knowing what to do when things don’t go as planned in the backcountry can save lives. Not only do you need life-saving gear and an understanding of how to use it, but you also need to have taken avalanche safety awareness classes, understand how weather patterns affect the snow, have a knowledgeable guide when going to a new place, and a mapped-out route. All of this is a lot easier said than done, so read on to learn more about the importance of backcountry safety, understand some key principles and practices, find out more about the resources available to you, and learn about the gear you need.

WHERE TO START

1. Educate: Learn what you need to do before you head out, avalanche safety resources available to you, and where to find proper training.

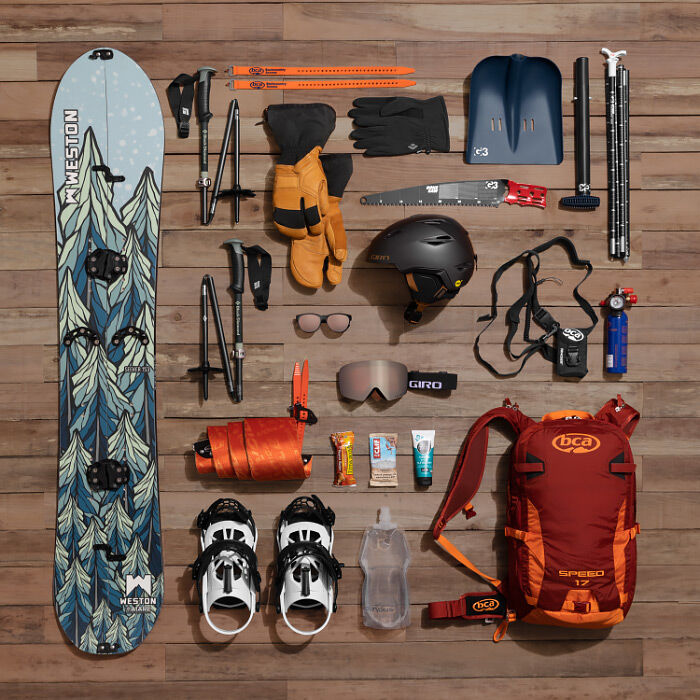
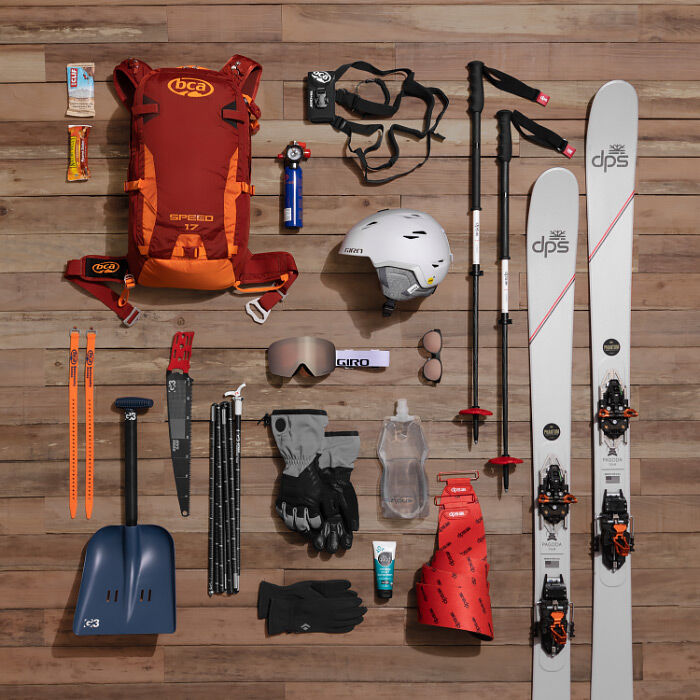
2. Gear Up: Gather necessary and lifesaving gear you’ll need to determine where and if you can ride.
3. Practice: What to expect when rehearsing how to check snow conditions, finding buried beacons, shoveling out a victim, and more.

4. Principles: The importance of paying attention to your surroundings, not going out alone, and being communicative are just a few of the many principles to remember when heading into the backcountry.

BEFORE YOU
HEAD OUT

All of the awareness and training in the world can’t guarantee you’ll be 100% safe, and “Know before you go,” is the slogan of backcountry safety for good reason. Avalanches are no joke. They’ve been known to take out trees, cars, people, and entire buildings. Knowing search-and-rescue techniques and the level of risk you should and shouldn’t take on will help you make smart decisions, including: if and when to go out; what to do if an avalanche occurs; and how to increase the odds of survival if things go wrong.

Utilize Avalanche Safety Resources

The first thing to do is take an avalanche safety course to learn rescue techniques, how to use life-saving equipment, and how to recognize unsafe avalanche terrain. If you start with beginner avalanche awareness training, it’ll help you get acquainted with your gear, movement, and the vocabulary, so when you’re ready for AIARE 1 (for example), you’ll be able to focus more on the lesson at-hand, and less on fussing with your gear.

Below is a list of resources to bolster your backcountry safety knowledge

Even if you’ve already taken a course or two, it’s good to take refreshers. Reviewing slope angles, rocks, cornices, wind and snow formations, vegetation, how avalanches travel in paths, why most avalanches travel on smooth exposed slopes between 25 and 60 degrees, and exceptions to the rules, is always a good idea no matter how experienced you are.

Once you’ve taken in-the-field courses, study the avalanche and weather forecasts in your area. The avalanche centers listed below are excellent resources to research weather models, snowpack data, field observations, and more. You’ll want to research your plan, route, and snow conditions before heading out, so you can change your plan if necessary.

When planning your route, know that avalanches can occur in open fields, through forested areas, smooth and steep slopes, and gullies. If you can ski or snowboard through it, an avalanche can slide through it, too.

If you have questions about the information you’re finding online, give your local avalanche center a call. They’ll be happy to help. Also, be sure to ask them if there was a storm or any fresh snow leading up to the days when you want to head out. You’ll want at least 24 hours for the snow to settle before you do.

Get proper backcountry gear

In addition to having appropriate skis/split board/snowboard/snowshoes, waterproof outerwear, and layers, having the right gear is paramount. Below is a checklist of items you’ll need, and a brief overview of each.


All members of your group will need to know how to confidently use all of their equipment before going out.

Beacon / avalanche transceiver

Avalanche beacons (also known as avalanche transceivers) have the ability to send and receive 457 kHz radio signals. It’s how others find you if you’re buried in an avalanche. Everyone in your party has to wear one, and turn it on, before getting on the snow. You’ll want to wear it under your jacket so the batteries stay warm and so it doesn’t fly off of you if you do get buried. If you’re buried, the other folks in your party will turn their beacons into “receiver” mode so they can hear the signal from your beacon. Most beacons work in ranges between 40 to 80 meters, and the signal will get stronger and beep more frequently the closer you get. Your beacon doesn’t output a signal in a straight line, but flux lines, and the best signal is received when the beacon is parallel to the flux lines. Searchers in rescue mode will move in a zigzag fashion to first pick up a signal onto the flux line, holding the beacon close to their belly, to get onto the path of the flux line. Remember, if you’re totally buried, the snow acts like concrete, preventing you from being able to move, so it’s extremely important your friends turn their beacons into search mode to find you, and that everyone is well-versed with their equipment. All beacons work a little differently, and technology changes quickly, so it’s important to practice regularly, and know how to fully use yours. There are also modes that you’ll need to understand if multiple people are buried, which you’ll go over in your avalanche courses. Finding one beacon in a parking lot during practice is much easier than finding multiple buried beacons in the backcountry in deep snow. Once your beacon has located the buried beacon, it’ll still read around 3 meters or less, and that’s when you’re in the fine search area. You want to remove your backpack, skis or board, and try to check different spots where you get the smallest reading. In your avalanche safety awareness class, you’ll learn techniques on how to truly get the lowest reading on your beacon, so you can begin probing and digging in the best location and make the proper markings in the snow. This step is important, because if you probe and dig in the wrong spot, you will have to start over and time is critical when someone is buried in the snow.

SHOVEL & SNOW SAW

You’re going to want to shovel about 1-2 meters away from where the probe is, keeping in mind that in a typical avalanche, a victim is about 1-1.5 meters under the surface. You want to paddle the snow away from you instead of scooping it, and alternate using the shovel on different sides of your body. A victim that is buried 1 meter deep requires about 1 ton of snow to be removed. Timing is of the essence in all of this, since oxygen for the rider buried is so limited. When you do find them, you may need to provide first aid to get some air into their lungs. Snow saws allow you to cut through the snow, read the snowpack, and make informed decisions about your findings. You’ll learn how to use this tool properly to create an isolated column of snow and observe the layers in your avalanche safety classes.

PROBE

If you are in search mode, have the strongest signal and can’t get any closer to the buried beacon, that’s when it’s time to deploy your probe. You want to start probing straight down into the snow in a spiral pattern as deep as you can go with your probe. If you don’t probe the buried rider on your first try, spiral outward with your probe, and check in spots that are 25 centimeters away. Not only are you trying to find your victim, but you are also trying to get a pathway of air to your victim. If multiple people are probing, make sure you start to probe a body’s width apart. Again, you’ll want to practice as much as possible so you can learn the difference between finding an oddity in the snow and finding something soft like a backpack (which could resemble a body). When you have found your victim, you’ll leave the probe in the snow where they are located. Then, look at your probe for a measurement on how deep the rider is.

HELMET

In the backcountry, since you’re typically doing a lot of touring, you want the lightest, most durable, and comfortable gear possible. At only 400 grams, the Giro Grid Spherical and Envi Spherical helmet have been made to lighten the load. Their key differentiator is how noticeably lightweight they are. Also boast-worthy is the ear pad/neck gaiter liner, which has been developed to be easily removed for long climbs. Plus, riders can rely on the benefit of a warm and quick-drying Polartec® liner as well as our innovative MIPS Spherical technology, powered by MIPS®, there to add an additional layer of protection in rotational impacts.

GOGGLE

The last thing you want in the backcountry is your goggles fogging up. Thought, consideration, and an acute attention to detail have been put into the Giro Contour. The Contour lacks any concern for fogging, offers best-in-class clarity, and features seamless compatibility. Most notable is the Contour’s improved EXV+, which delivers the largest field-of-view in its class so you can truly expand your vision on the mountain. Pair that with the quick-change lens system, and tried-and-true VIVID technology, for ease and optimal clarity.

WATER

Staying hydrated is extremely important. Having a lightweight, durable, and reusable water bottle and remembering to fill it up before you go, is the way to go.

HIGH-ENERGY FOOD

You don’t want to have to carry more than you need to. Calorie-condensed fruit and granola bars, nuts, and pocket bacon are great choices.

PRACTICE BEFORE YOU GO

Go to a completely flat snowy area and practice using your gear and searching for your friend’s avalanche receivers. Not all beacons are exactly the same. You want to ensure you and your buddies have rehearsed enough so you can find each other quickly if necessary.

Check your local mountain for uphill access (where you bypass the ski lift and climb to the top of the mountain, also known as “skinning,” “alpine touring” or “ski mountaineering”). This is a great place to start as long as the slope angle is less than 30 degrees.

Principles to Remember on the Mountain

When you are finally ready to embark on your backcountry trip, whether it’s your first one or your hundredth one, don’t forget to:

Pay attention to your surroundings. You need to constantly keep an eye on your environment. Snowpack, wind, terrain, and weather continually change throughout the day so it’s important to pay attention to these indicators for a potential slide.
Be proactive about your snowpack stability tests. There are snow saw, ski pole, resistance, and shear tests that can help you figure out if the snow is unstable. Keep in mind that these tests are not foolproof and reading snow and terrain features and snowpack features takes many years of experience.
When crossing a potential avalanche slope or through unstable snowpack, avoid it if you can, or have one rider go at a time with at least 100 feet of space between riders. Not only does this put less pressure on the snowpack, but if someone does get caught, it increases the maximum number of rescuers for the victim.
It’s unsafe to assume that a route is safe if you simply see tracks. Snowpack changes all throughout the day.
Be communicative about where you want to go, where you are stopping, where you will meet, route plans, and if you have any doubts or fears. It’s better to be over-communicative than under-communicative, and other riders will appreciate your concern for safety.
Don’t leave the group or go out alone. If you absolutely must go out alone, notify friends where you’re going and what time you think you will be back.
Be choosy about the riders you go into the backcountry with. Heading out with like-minded riders who are serious about safety, can handle stressful situations, and who have similar goals is important and can mean the difference between a safe and fun trip and a disaster. Heading into the backcountry is such a rewarding experience. Bringing the proper tools, having the right training, and knowing what to do if something goes wrong is imperative when charting into this new exciting exploration.


Heading into the backcountry is such a rewarding experience. Bringing the proper tools, having the right training, and knowing what to do if something goes wrong is imperative when charting into this new exciting exploration.

TIPS FROM THE
PROS

“Everyone is welcome in the backcountry and everyone belongs, however it’s important that we all work together in a kind, welcoming manner to educate ourselves and one another on how to find the time and place that is best. Sharing resources and knowledge will help us all be safe and have more fun together!”
– Ingrid Backstrom

“I think the most important part about going into the backcountry is having a clear objective for the day. I also think it’s equally important to make sure everyone in your group knows the location and route you’ve chosen for your day in the mountains”
– Nils Mindnich

“Besides avalanche equipment, communication is a huge thing out there. Make sure you have good radios and are all on the same channel at the start of the day. Cell reception usually isn’t great in backcountry zones. Also having a spot emergency device in your group is a very smart thing to have if someone is seriously injured.”
– Callum Pettit